donderdag 31 maart 2011

Review: Essence Express Dry Spray

De Express Dry Spray van Essence is eigenlijk een beetje de voorganger van de Express Dry Drops (zie review hier). De Express Dry Spray had ik al een tijdje in de kast liggen, maar na de mislukte poging met de dry drops besloot ik om deze te gaan testen!

The Express Dry Spray is the predecessor of the Express Dry Drops (Review here). I never used this Express Dry Spray, but when the attempt with the dry drops failed, I decided to try out the dry spray!

 Laten we beginnen met het uiterlijk van het flesje, de kleur van het flesje vind ik erg leuk, en er zitten leuke versieringen op (zie foto hierboven). Verder vind ik dat het flesje wat weg heeft van een deospray, kijk dus uit dat je deze niet naast een deo neerzet! ( Je wilt je oksels niet sprayen met Express Dry Spray!). Het product zelf beloofd dat je nagellak sneller droogt. 30 Seconden na het aanbrengen van je nagellak even sprayen over je nagels heen op 30 cm afstand.

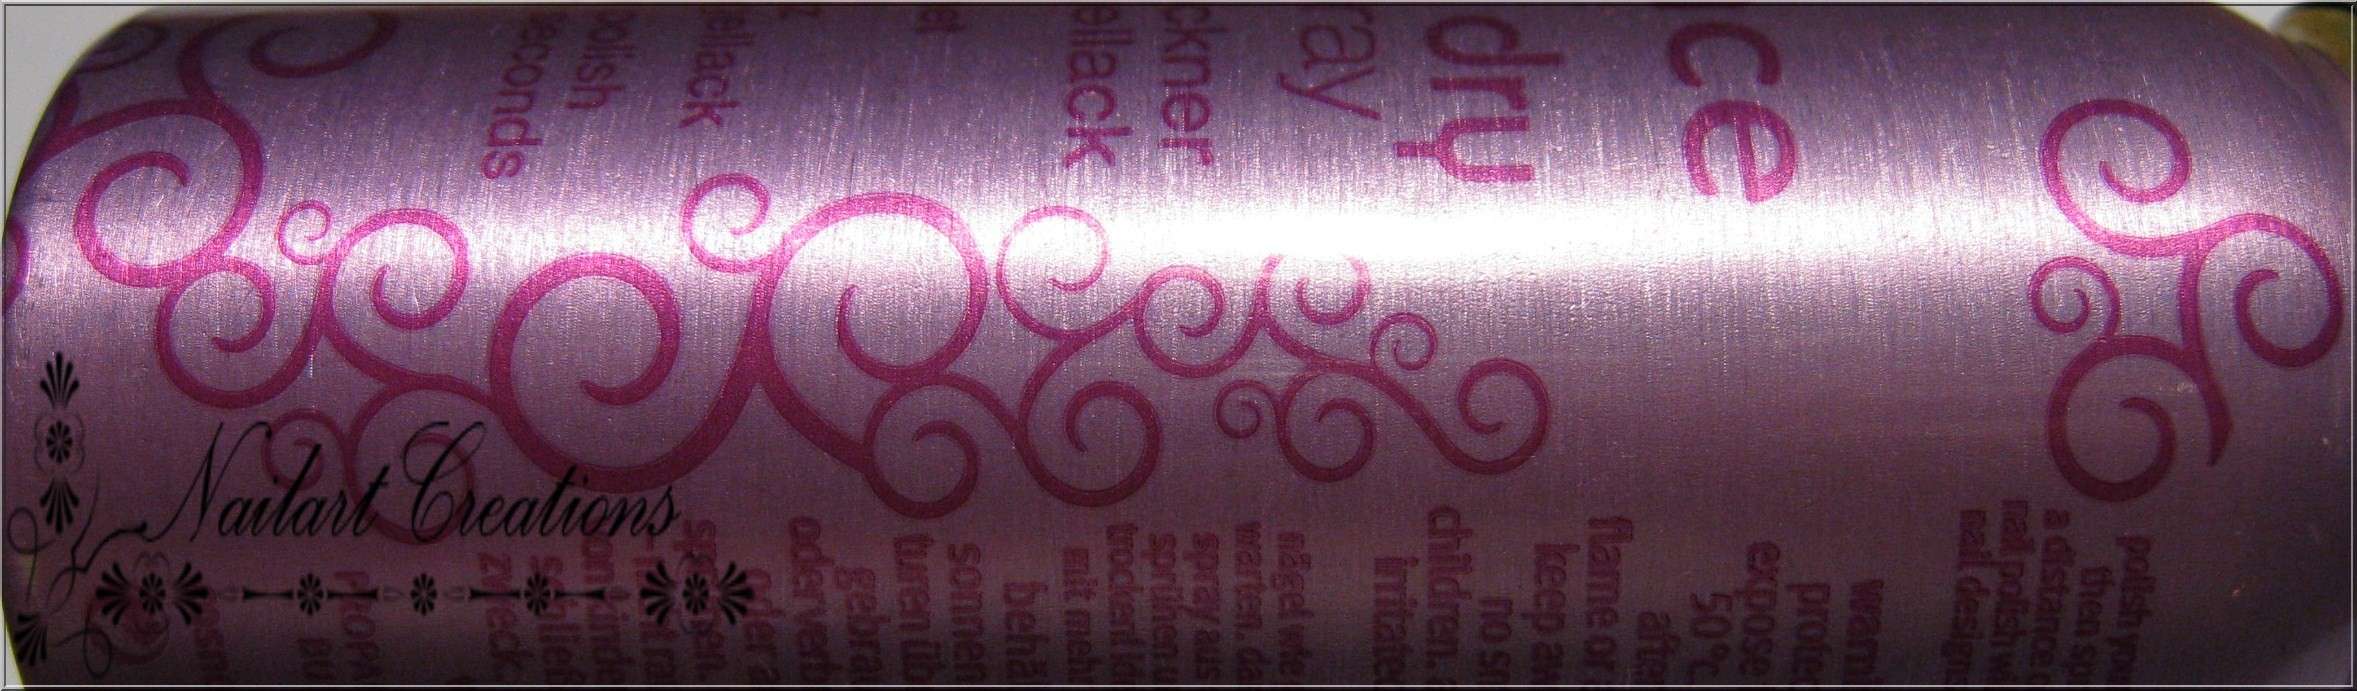
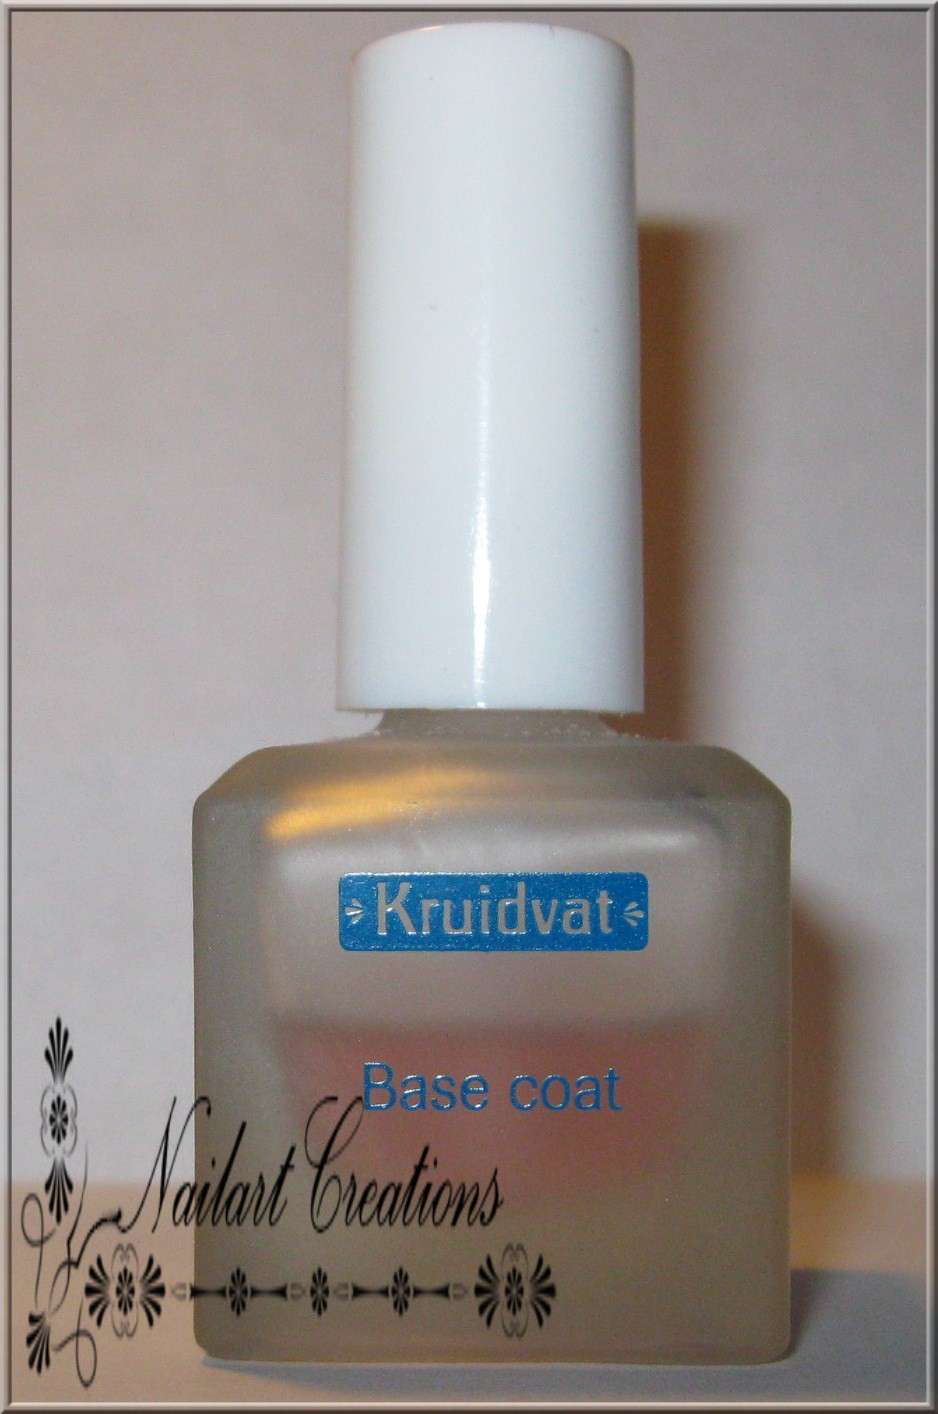
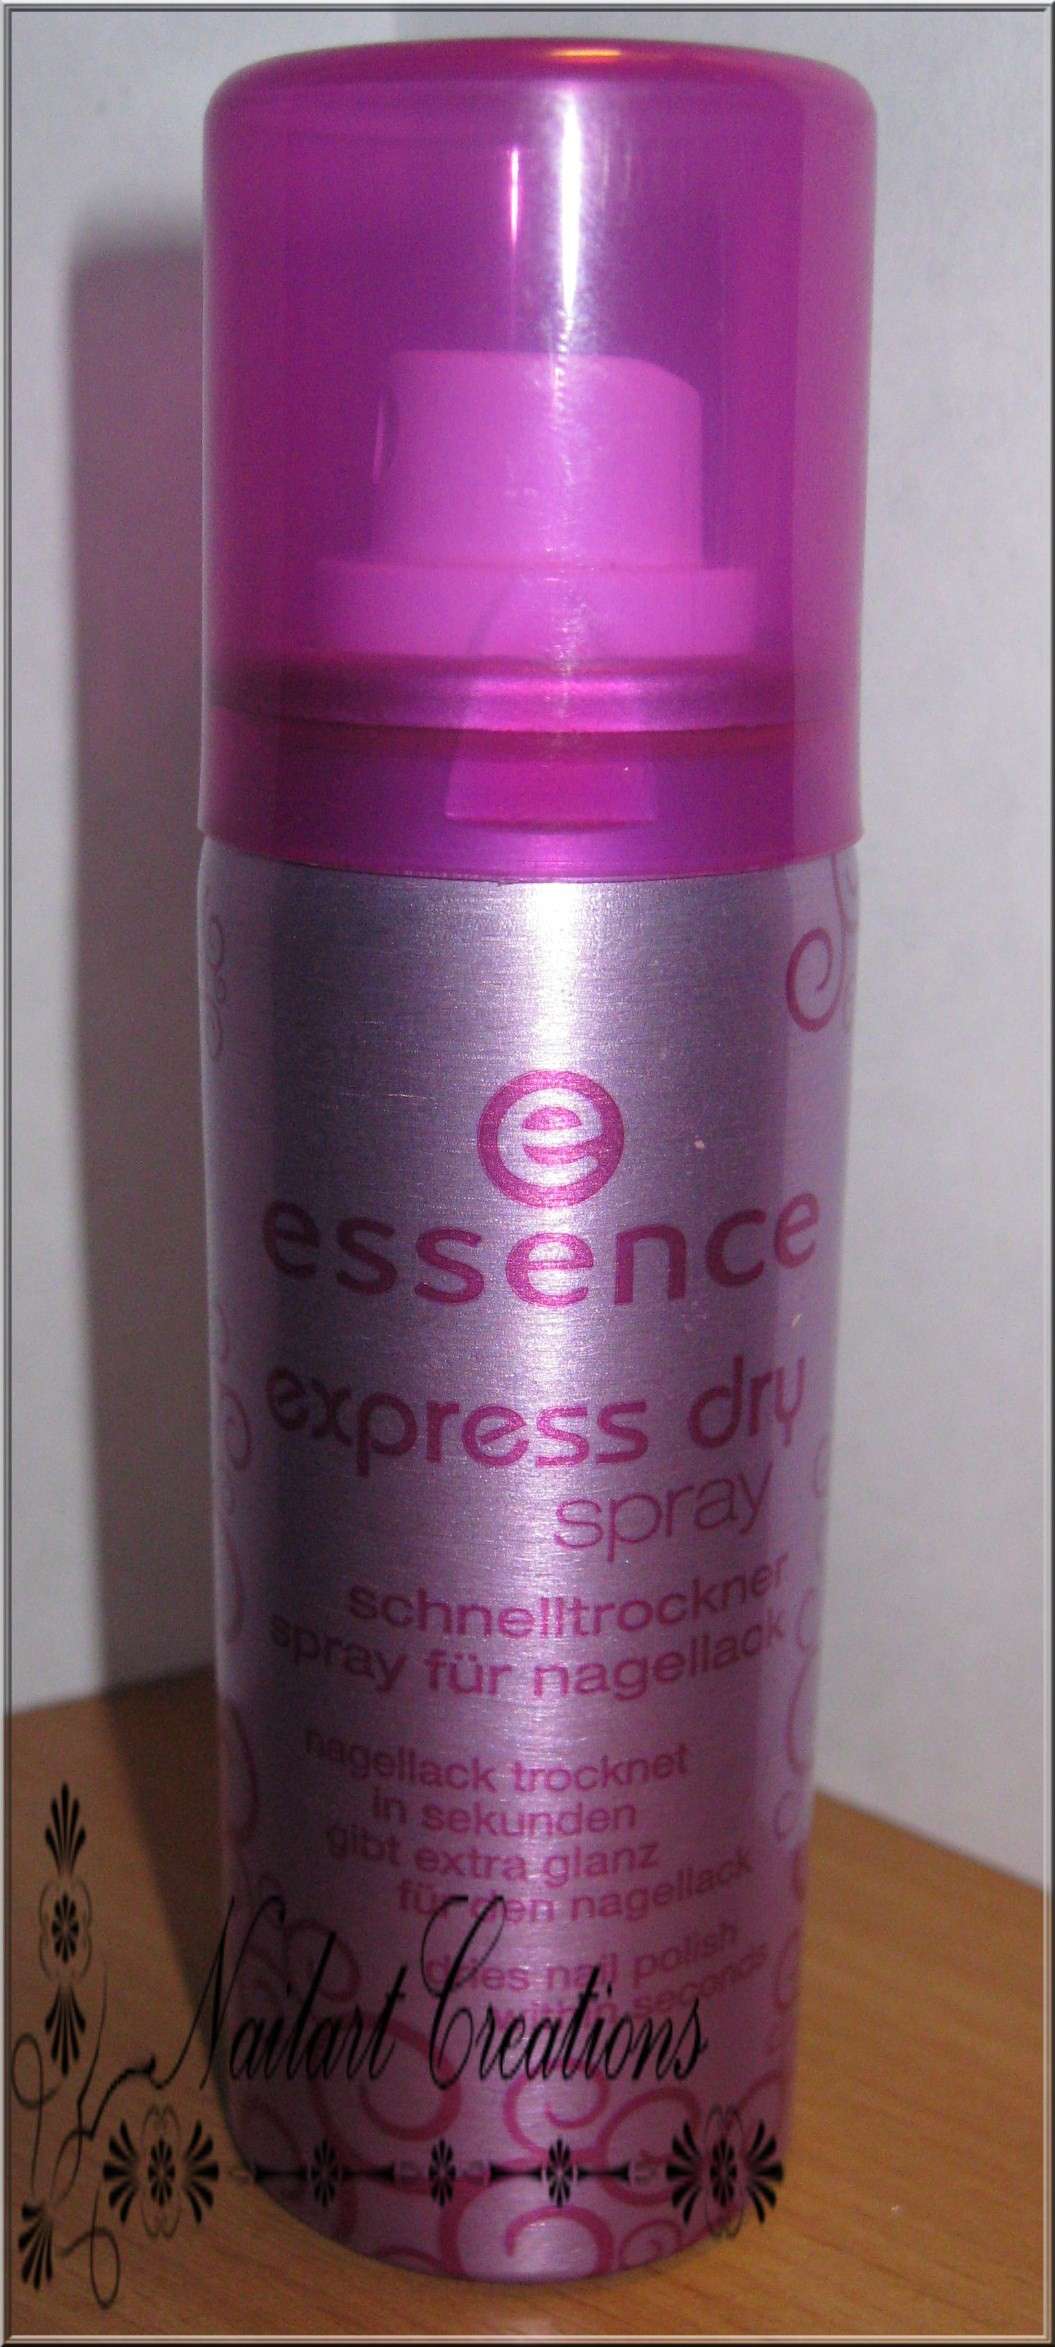
Let's start with the look of the bottle, I like the colour of the bottle, it's nice pink! The decorations on the bottle are nice feminine too (like above picture). The only thing is that this bottle looks exactly like a deodorant, so make sure you don't put this product next to your deo (seriously you don't want do express dry spray your armpits). The product say that it dries your nailpolish quickly. Polish your nails, wait 30 seconds and spray with 30 cm distance on your nails.


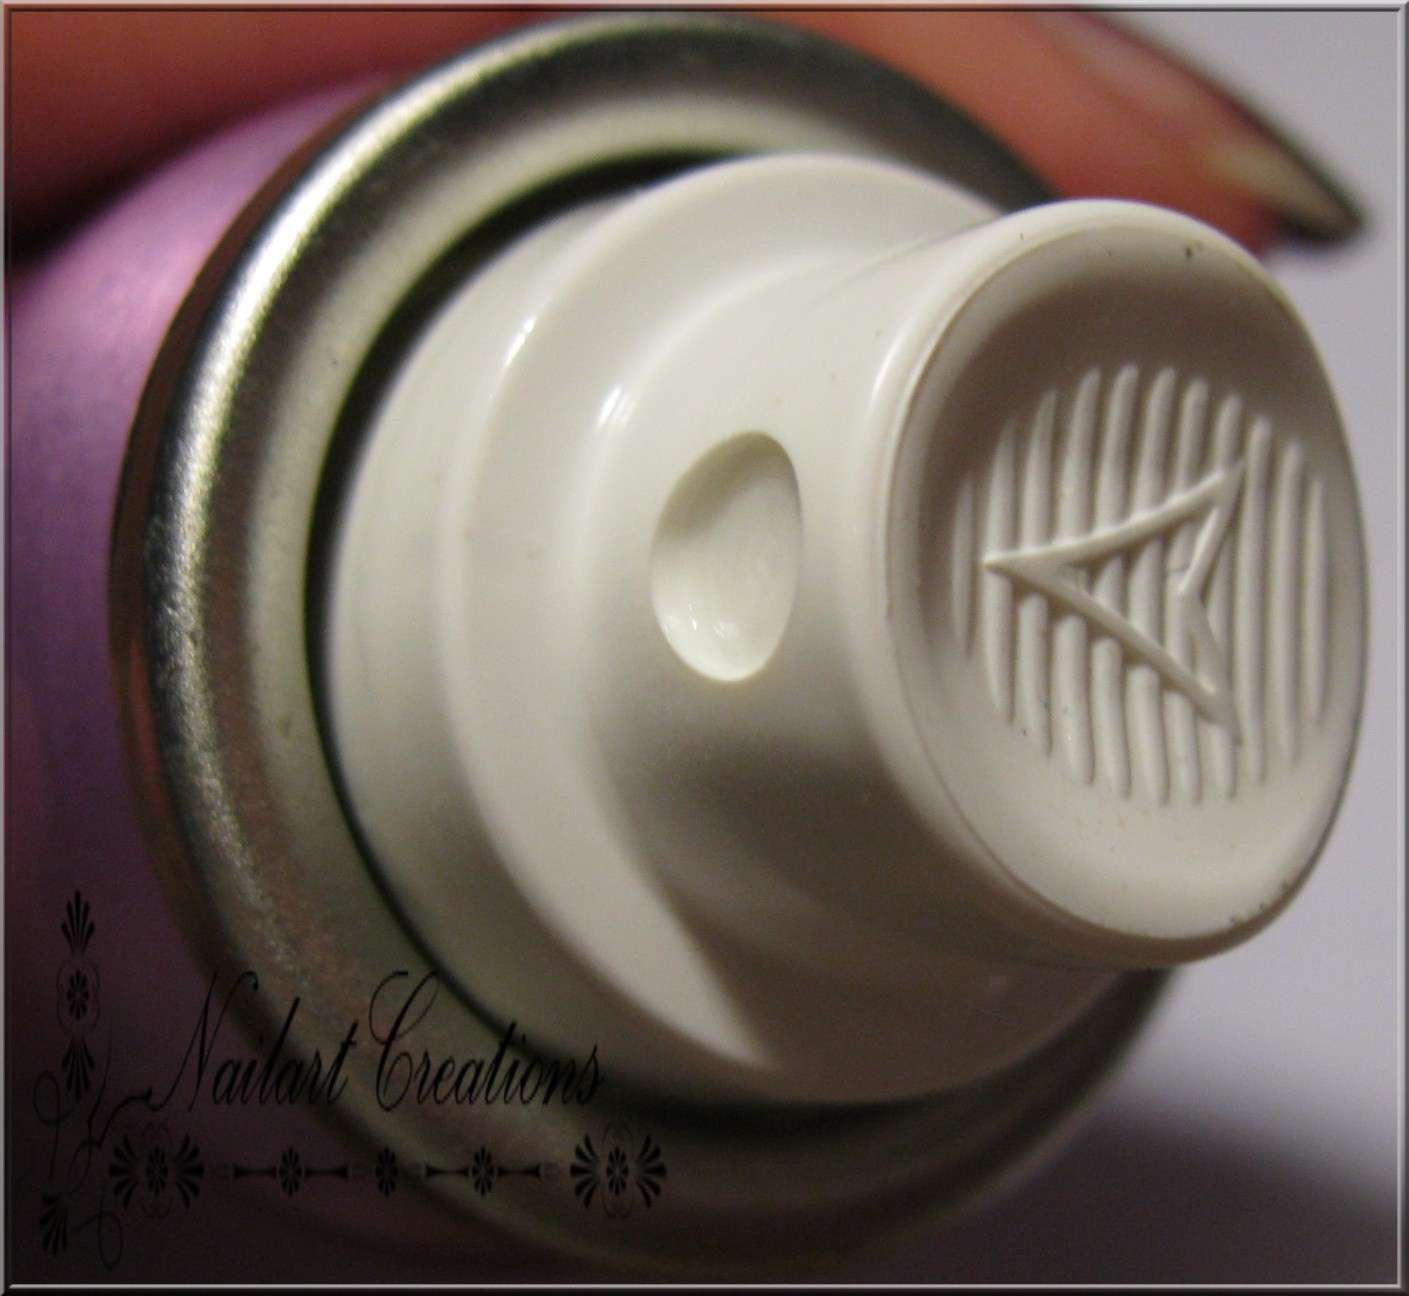
Dit flesje heeft een heel handig spraydopje, iets wat ik veel handiger vind dan wat de dry drops heeft. Hier kun je de dop weglaten en vlak na het lakken meteen snel op iedere nagel sprayen. De kans is ook veel kleiner dat je je nagellak verpest omdat je geen dopjes van flesjes hoeft af te draaien. Dik pluspunt!

This bottle got a nice spraycap, this is very handy! It's way better then de pipet which the dry drops got. When you start polishing your nails, you can remove the cap from this bottle so you don't ruin your nailpolish. After polishing you can spray your freshly painted nails easily. Big asset!

Zo ziet je nagel eruit na het sprayen, Natuurlijk moet je wel eerst je nagels lakken, ik heb hierboven even gesprayt op een kale nagel zodat je goed kunt zien dat deze spray een vettige laag achter laat. Maar dan de hoofdvraag? Droogt de nagellak ook sneller? Oke je moet nu dus echt géén wondermiddel verwachten, maar de nagellak droogt inderdaad vrij snel, denk aan een minuutje of 3/4. Ik zou je wel adviseren om geen spray te gebruiken over je eigen nagellak wanneer je er nog nailart overheen wilt maken. De spray laat een vet laagje achter, dus hieroverheen stempelen is zo goed als ommogelijk, dit glijdt allemaal weg! Wanneer je enkel je nagels in een kleurtje lakt, of een mooie nailart hebt gemaakt raad ik wel aan om even te sprayen, scheelt een hoop tijd!

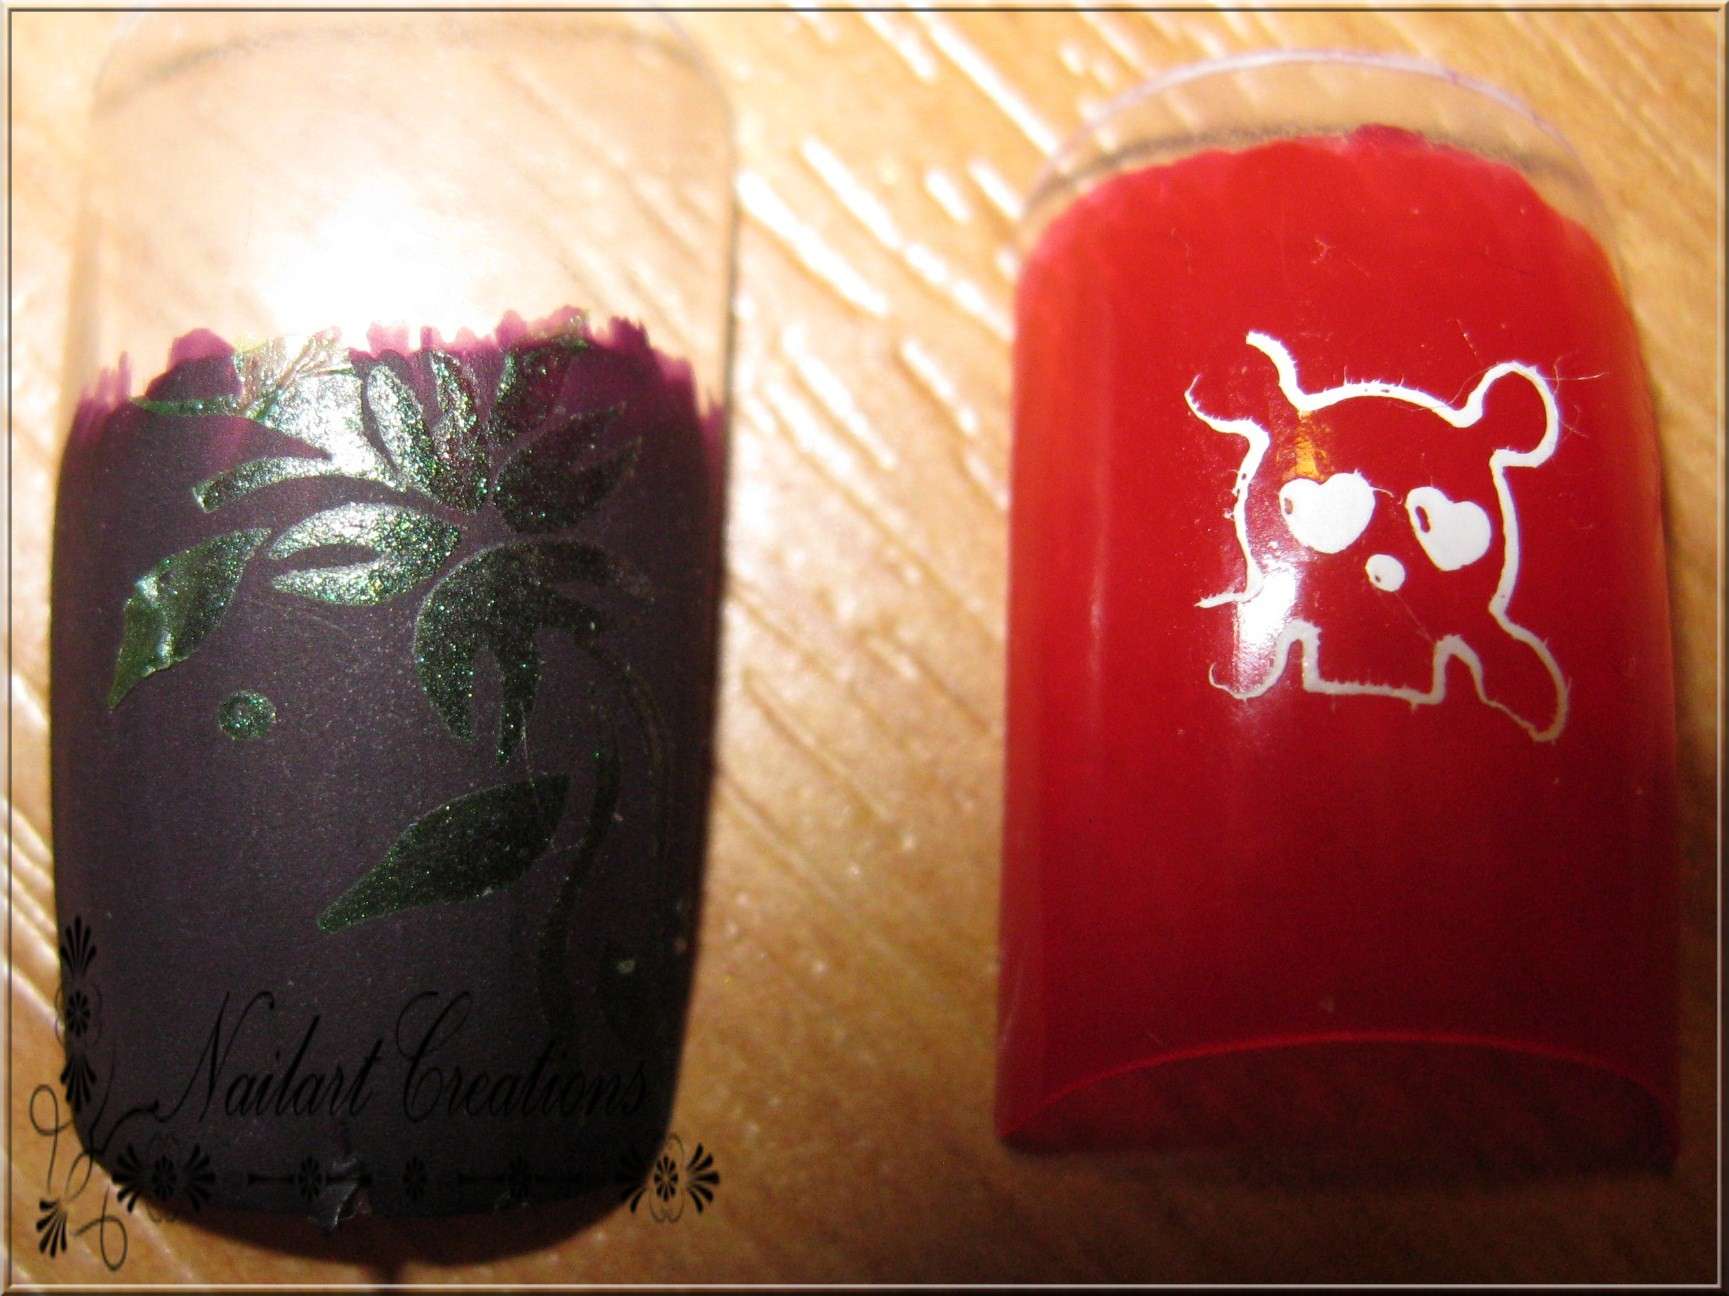
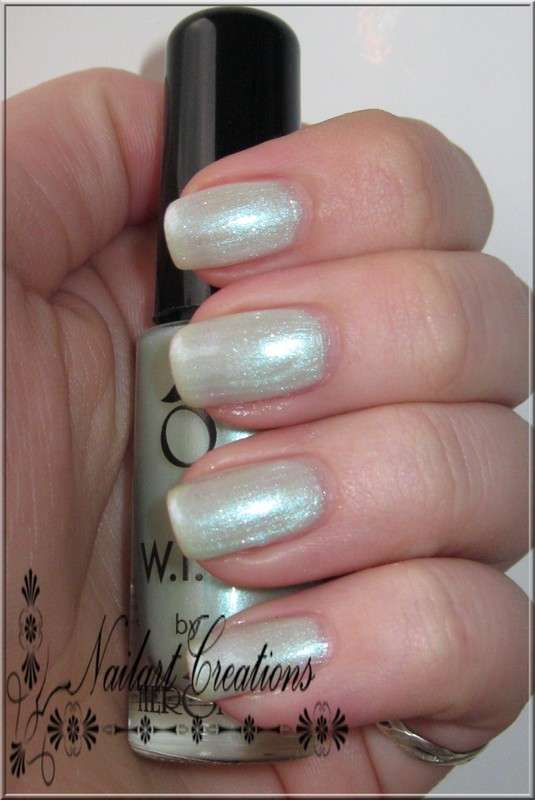
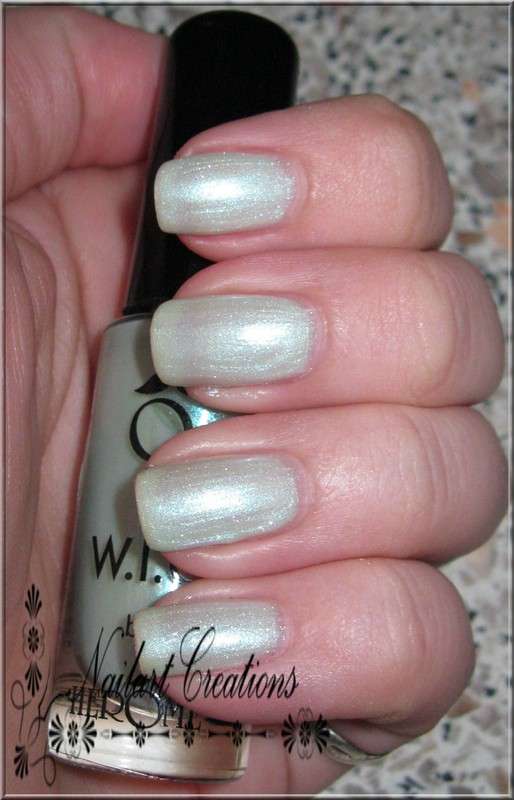
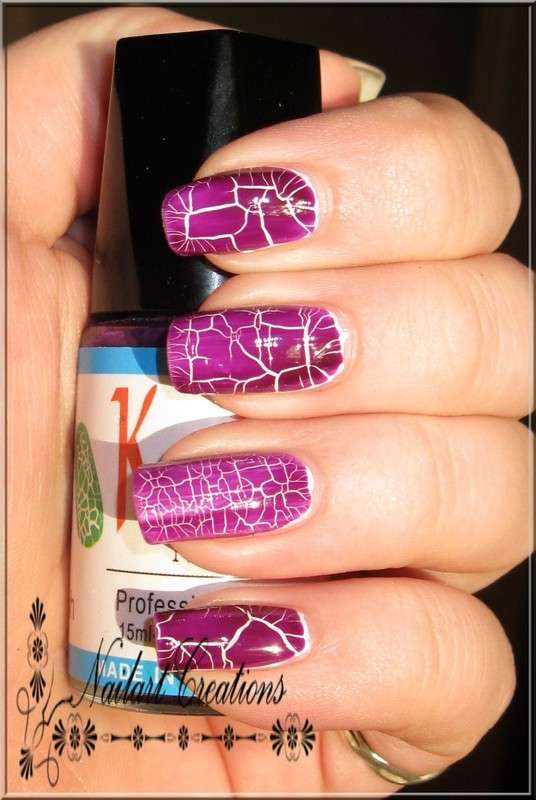
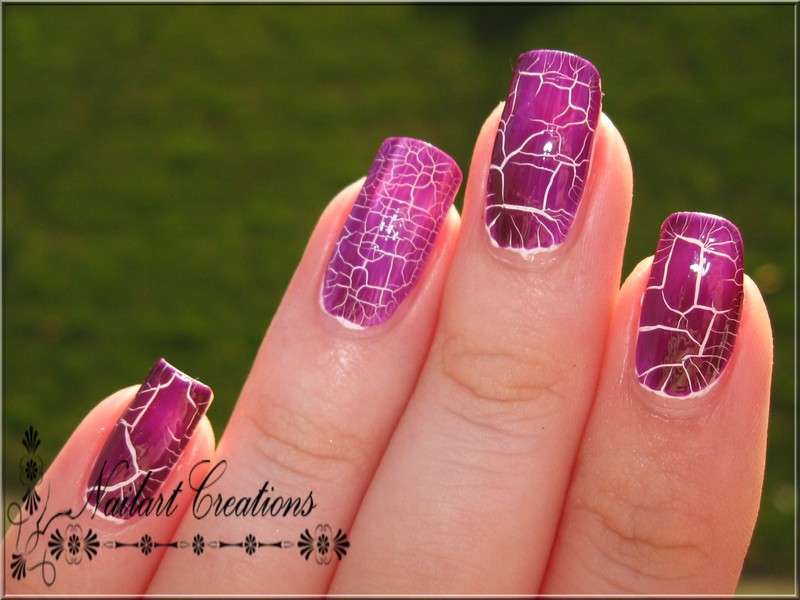
This is how my nail looks after spraying. Ofcourse you've got to polish your nails first, I didn't because I wanted to show you the look on a naked nail, as you can see it leaves a greasy layer on your nail. But now the head question! Let this product dry your nailpolish faster? Alright don't expect any wonderthings, but yes your nailpolish dries faster, think about 3/4 minutes. I'll advise not to spray your nailpolish when you want to add some nailart, because of the greasy layer you'll be unable to stamp or make a nailart. When you just polish your nails with one colour, or when you just finished your nailart, I'll advise to use this spray. It really dries faster!

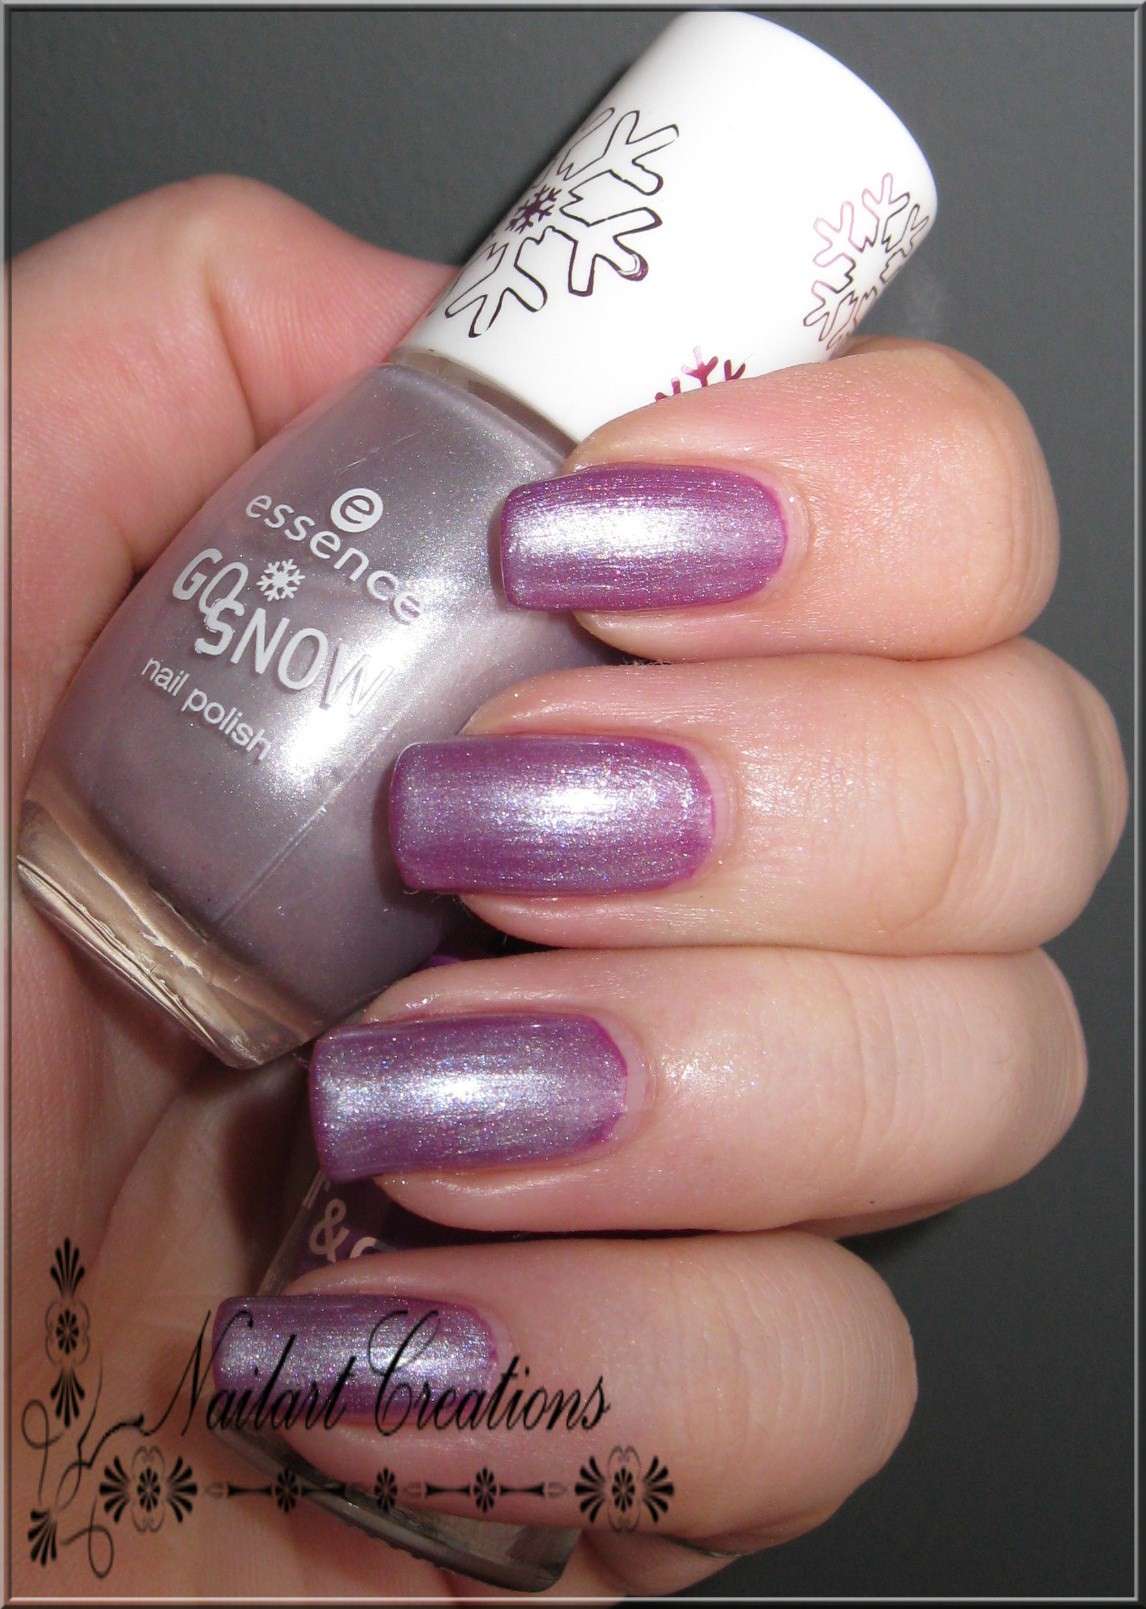
De Express Dry Spray is te koop bij drogisterijen welke Essence verkopen, een flesje kost ongeveer €2,80. Ik weet niet of dit product inmiddels uit het assortiment is of nog steeds in de schappen ligt, maar wanneer je hem ooit tegenkomt in de uitverkoopbakken, het is echt een fijn product!

You can buy the express dry spray in the stores which are selling Essence products. One bottle costs €2,80. I'm not sure if this product is still available, but when you ever see it i'll advise to buy! It's a really nice product!

woensdag 30 maart 2011

Da Vinci - Nr 250

Vandaag de swatches van een voor mij totaal onbekend lakje/merk, en waarschijnlijk voor vele van jullie ook! Dit lakje is van het merk Da Vinci, ik heb dit lakje in de giveaway van Spooky Nails gewonnen en komt dus uit Polen. De dames uit Polen zullen dit merk dus waarschijnlijk wel kennen!

Today the swatches of a total unknown brand to me, and probably for some of you too! This polish is from the brand Da Vinci, I've won this polish in Spooky Nails' giveaway, so it's from Poland. Ladies from Poland will know this brand!


Nr 250 is een prachtig nude kleurtje. Eerder moest ik eigenlijk nooit iets van nude lakjes hebben, maar de laatste tijd begin ik de nude lakjes echt meer te waarderen! Ze zijn echt perfect als basis voor een mooie nailart! Het flesje is trouwens ook heel leuk, hij is precies het spiegelbeeld van een Safari lakje! Ook heeft de dop een ontzettende leuke vrolijke print, zo valt hij toch wat meer op!

Nr 250 is a gorgeous nude polish. A while ago I really hated all those nude polishes, but now I learned to appreciate nude polishes, I'm finally beginning to like them! They're absolutely perfect for a nailart base! The bottle is nice to, it's the mirror image from Safari bottles! The cap got a nice happy print on it, so it's popping out of my stash now!

Zoals je kunt zien is de dekking van dit lakje heel goed! Verrassend goed eigenlijk, ik had maar 2 dunne laagjes lak nodig om hem volledig dekkend te krijgen. De applicatie was ook erg goed, fijn kwastje mooie creamy finish. De droogtijd was ook erg fijn, hij droogde erg snel doordat je maar 2 dunne laagjes lak nodig hebt!

As you can see, the coverage is really good! Surprising good! I used 2 very thin layers on above pictures. Application was nice too, nice brush and a beautiful cream finish. Dryingtime was good too, because of the 2 thin layers!


Kortom, ik vind dit een erg fijn lakje! Helaas weet ik niet wat een lakje kost, of waar het te krijgen is. Het enige wat ik dus weet is dat dit merk uit Polen komt! Konden jullie dit merk al? En hebben jullie al eens iets geprobeerd van dit merk?

Conclusion: I really like this polish! Unfortunately I don't know how much this polish costs or where you can buy it. The only thing I know is that this polish is from Poland! Did you know this brand before? Ever tried anything from this brand?

dinsdag 29 maart 2011

Nailart on Popsticks #8 (Donald Duck!)

Nog net een aantal dagen op tijd voor de maand verloopt een nieuwe Nailart on Popsticks! Deze variant ga ik wat uitgebreider laten doen omdat ik hem recent gemaakt heb dus meteen ook even alle gebruikte spullen heb vastgelegd! Kijk je mee?

Just a few days before the new month is starting: another edition from Nailart on Popsticks! This time i'm going to show it a little bit extensive, because I made this one recently. So I remembered to take a picture of all the stuff I used! Do you watch with me?


Hierboven alle gebruikte spullen, ook zie je een donald duck pasje liggen, deze heb ik namelijk gebruikt als inspiratie! (ja ik haal uit de meest gekke dingen inspiratie, ken je dat inspiratie van een pasje, een douchegordijn etc etc??). De lakjes die ik gebruikt heb zijn La Femme Beauty - White, Blue Cream, Ultra Blue. Essence - Get The Fever. Eyeko - Rain polish, Max - Black en een klein penseel + dottingtool.

Above all the stuff I used for this nailart. You can see a little card from Donald Duck, I used this one as my inspiration! (Yes I get inspiration from weird things, a card, shower curtain etc?). The polishes I used are: La Femme Beauty - White, Blue Cream, Ultra Blue. Essence - Get The Fever. Eyeko - Rain Polish, Max - Black and a little brush and dottingtool.

Dit is de nailart geworden! Lijkt hij op het pasje of niet! (In het geval van wel, heb ik mn best gedaan haha!). In ieder geval is het dus het halve gezicht van Donald Duck geworden! Je ziet bijna niet dat de popstick nog een achtergrond kleur heeft, maar dit is wel het geval. Net zoals op het pasje heb ik de mijne ook een achtergrondkleur gegeven, alleen een niet zo felle blauw. Ik heb gekozen voor één laagje La Femme Beauty - Ultra Blue (Het hele rechtse lakje op de eerste foto). Met één laagje is hij mooi sheer dus kon ik nog mooi de nailart eroverheen maken.

So this is the nailart! Does is look like the card? (Well if the answer is yes, I've done my best!). Anyway it's halve the face of Donald Duck! You can barely see if this popstick got a basecolour, but yes it has a basecolour! Just like the card I used a blue polish, but I choosed not a very bright blue. I used La Femme Beauty - Ultra Blue (Which is the right polish on the first picture) just one coat of this. With just one coat you can see the nailart nicer instead of a popping background.

En meteen even een vergelijking met het pasje erachter! De omlijning is gemaakt met Max - Zwart en het penseeltje, het is moeilijk uit te leggen hoe, maar ik heb gewoon een beetje de omlijning van het pasje aangehouden. Het gezicht van Donald Duck is ingekleurd met La Femme Beauty - White. De snavel is ingekleurd met Essence - Get the Fever. Het petje is ingekleurd met La Femme Beauty - Blue Cream. Het oogje zelf is met Eyeko - Rain polish en Max - Black ingekleurd. De dottingtool heb ik gebruikt voor het inkleuren van de wat grotere oppervlaktes, voor de kleine oppervlakken heb ik weer het penseeltje gebruikt.

And ofcourse a comparison with the card as the background! I made the outlining with a little brush and Max - Black, it's hard to explain how, but I just followed the lines on the card. The face from Donald Duck is colored with La Femme Beauty - White. The beak is coloured with Essence - Get The Fever, the hat is colored with La Femme Beauty - Blue Cream and the eye is colored with Eyeko - Rain polish and Max - Black. I used the dottingtool for coloring the big surfaces, and the tiny brush for the little surfaces.

Wat vinden jullie van deze popstick?/ What do you think about this popstick?

maandag 28 maart 2011

MNY - Nr 753

Vandaag weer eens een lakje van MNY, ik betrap mezelf erop dat ik eigenlijk heel weinig gebruik maak van deze lakjes. Ook het lakje van vandaag was niet erg bevordelijk om meer gebruik te maken van dit merk. Benieuwd waarom? Lees snel onderstaande review met bijbehorende swatches!

Today a polish from MNY, it's a while ago I used a polish from MNY. I caught myself of not using this brand very much.. The polish of today didn't help my opinion about this brand very much. Curious why? Ready my review and take a look at the swatches!

Bovenstaand lakje is nummer 753, dit is het eerste nadeel aan de lakjes. Deze lakjes hebben allemaal nummers, iets waardoor ik lakjes niet onthoud! Een leuke naam maakt een lakje zoveel leuker, ook onthoud je de namen beter waardoor je vaker terugdenkt aan dat lakje! Nummer 753 heeft een mosgroenige kleur met een lichte shimmer erdoorheen.

Above polish is number 753, that's my first point of not liking this brand. Pff the numbers, why numbers?? A nice name will fit the polishes much better, and I will remember names better, so I'll grap a polish easier. So nr 753 got a moss green colour with a nice shimmer in it.


En dan komen we meteen bij punt 2 en punt 3 waarom ik MNY weinig gebruik. De dekking van de lakjes, pff bovenstaande foto's zijn 3 dikke lagen! En nog zie je een duidelijke VNL (en dan heb ik nog de foto's uitgezocht die het minst vnl lieten zien!). En punt 3 is de droogtijd, doordat je veel en dikke lagen moet gebruiken is de droogtijd ontzettend lang, zoals je kunt zien heb ik met mijn vingers al in de nagellak op mijn wijsvinger gezeten.. 

And now point 2 and 3 why I don't like this brand that much. The coverage of the polishes.. I used 3 very thick layers on above pictures, and you'll see a vnl anyway (and I picked out the pictures with less vnl). Point 3 is dryingtime, it's horrible. When you use 2 thick coats, dryingtime will take hours! As you can see, I already putted my finger in the polish from my index...

Al met al, één lakje MNY kost per stuk €2,50, dat is evenveel als een lakje van Catrice kost. De lakjes van Catrice zijn een stuk beter, hebben een betere dekking, een fijnere applicatie etc etc. Ik heb nog een aantal lakjes van MNY liggen, deze zal ik in de loop van tijd nog eens testen en reviewen.

Alright, one polish of MNY costs €2,50. That's the same price as one bottle of Catrice polish. So I like the Catrice polishes way better, good coverage, nice application, nice brush etc. I've got some other MNY polishes, so I'll review them in a while, but I think I won't buy any MNY polishes anymore.

Verder kunnen jullie een aantal kleine veranderingetjes zien op mijn blog, op de zijbalk staat een afbeelding van Born Pretty Store, een onwijs goede webshop met prachtige producten voor een lage prijs. Met één klik op het plaatje kom je in de webshop terecht, ontzettend handig dus! Verder ben ik momenteel bezig met het uitvogelen hoe ik een 'read more' knop kan toevoegen, helaas is dit niet zo succesvol, dus als er iemand is die hier alles van weet en mij kan helpen, héél graag! Je kunt mij een mailtje sturen op: nailartcreationsblog@gmail.com!

Further you'll see some new things on my blog, first on the right upper side of my blog. You'll see a little picture from Born Pretty Store, a very good webshop with gorgeous products for a cheap price. With one click on the picture you'll be in the webshop! Very easy when you want something! Further i'm busy with adding a 'read more' button, but unfortunately this isn't very succesfull. When someone knows everything about this and will offer me some help with this, thank you very much! You can email me to nailartcreationsblog@gmail.com when you know how I can add this!

zondag 27 maart 2011

Notd: Bloody Fingerprints!

Haha nee, geen zorgen ik heb niemand vermoord ;). Bovenstaande afbeelding is mijn inspiratie geweest voor de nailart die ik jullie vandaag ga laten zien. Om even wat meer informatie te geven, bovenstaande afbeelding is een foto van een douchegordijn! Toen ik dit gordijn zag hangen kreeg ik meteen inspiratie voor een nieuwe nailart!

Haha no! Don't worry, I didn't kill someone ;). Above image was my inspiration for the nailart i'm going to show you today. For your information, above image is a picture of a shower curtain, so it's painted, not real blood. When I saw this curtain I immediatly got some inspiration!


Dit is de nailart geworden! De witte achtergrond is La Femme Beauty - White, het welbekende goed dekkende witte lakje welke ik zo goed als altijd gebruik. De bloederige vingerafdrukken zijn gemaakt met Max - Riviera Red.

This is the nailart! The white background is made with La Femme Beauty - White, a good opaque white polish, I use this white all the time! The bloody fingerprints are made with Max - Riviera Red.

Deze nailart is echt easy te maken! Iedereen met vingers kan dit! Je begint met een laagje basecoat en een laag met de gewenste basiskleur, ik heb hier 2 laagjes White aangebracht. Vervolgens zoek je het lakje uit waar je de vingerafdrukken mee wil maken. Van dit lakje leg je een paar druppeltjes op een blaadje, dip je vinger hierin, en dip hem nog een paar keer af tegen een wit blaadje zodat je niet al teveel lak op je vingers hebt. Vervolgens dip je je vingers op je nagellak, zorg er natuurlijk wel voor dat de nagellak goed droog is! Et voila! Je eigen vingerafdrukken in je nagellak, easy toch?

This nailart is very easy to make! Everyone with fingers can make this! Just start with your basecoat and the colour nailpolish which you want to use for the background, I used 2 layers of White. Up next you're picking out the polish for the fingerprints. Put a drop nailpolish on a piece of paper and dip your finger in it. Dip your finger again on a piece of white paper so you don't have to much nailpolish on your finger. Then dip it on your nail, et voila! Done is your fingerprint nailart! Easy huh?


P.S. Geen zorgen als er vanavond opeens iets raars gebeurd op mijn blog! Er wordt vanavond gewerkt aan de technische kant van mijn blog, ook ga ik binnenkort over op een eigen domein, maar dit wordt natuurlijk vantevoren gemeld!

P.S. Don't worry when you see strange things on my blog tonight. I'm working on the technical part of my blog tonight! Very soon my blog is going to have an own domain name, but ofcourse I'll inform you more about this later!


Wat vinden jullie van deze nailart, en gaan jullie deze makkelijke vorm van nailart ook uitproberen?/What do you think about this nailart, and are you gonna try this easy way of nailart?

zaterdag 26 maart 2011

China Glaze - He's Going In Circles

Ah He's Going In Circles! Een prachtig lakje van China Glaze uit de Kaleidoscope collectie. Lakjes uit de Kaleidoscope collectie zijn tegenwoordig erg moeilijk te verkrijgen, dus natuurlijk was ik superblij toen ik dit lakje nog aantrof in de showroom van Auryn! Met wat goed zoeken kun je deze lakjes nog wel vinden op bijvoorbeeld Ebay, alleen wel voor een pittige prijs!

Ah He's Going In Circles! A beautiful polish by China Glaze, this polish is from the Kaleidoscope collection, which was a LE. Polishes from the Kaleidoscope collection are hard to get lately, so I was extremely happy when I saw this polish at the showroom from Auryn! You can buy some of the Kaleidoscope polishes at Ebay, but they're pretty expensive!


Er zit trouwens een verschil in de potjes van de Kaleidoscope collectie! De dopjes van deze lakjes zijn namelijk zilver van kleur in plaats van zwart, misschien goed om te onthouden! De kleur zelf heeft een hele lichte zee groenige tint, en natuurlijk is hij holografisch! Helaas is het holografische niet zo heel goed te zien aangezien er geen zon aanwezig was... Wel kun je alle prachtige glinsteringen goed zien!

Maybe it's good to know that the bottles from the Kaleidoscope collection are a bit different then the normal bottles, they got a silver cap instead of a black one, so keep it in mind! The colour is a very light seagreen with holographical parts ofcourse! Unfortunately the holo isn't good to see on my pictures because mister sun disappeared! You can see the gorgeous shiny parts on this picture!

He's Going in Circles is een lakje wat behoorlijk dun is! Ik heb op bovenstaande foto's 2 hele dunne laagjes gebruikt omdat ik dit lakje als basis zou gebruiken voor een nailart, je kunt op bovenstaande foto dus ook héél licht wat VNL zien. Doordat de substantie van dit lakje erg dun is zit je ook sneller met de lak tegen je nagelriemen aan, ach na een tijdje wordt hij vast wel iets dikker!


He's Going in Circles is a pretty thin polish! I used 2 very thin layers on above pictures, because I was going to use this as the background for my nailart, so you van see a little bit VNL an my picture. Because the substance was very thin it's very easy to spill your nailpolish onto your cuticles, so maybe I have to wait until this polish is a little bit thicker!

En omdat dit zo'n prachtig lakje is nog even een extra fotootje! Ik vind het echt superjammer dat deze lakjes niet meer zo makkelijk te krijgen zijn. De nieuwe Tronica collectie blijkt helemaal niets te zijn vergeleken met de Kaleidoscope en de OMG collectie! Ik denk dus ook dat ik de Tronica collectie aan mij voorbij laat gaan.

And because this polish is so pretty, an extra picture! I think it's such a shame that they don't make this polish anymore and it's hard to get. I heard that the new Tronica collection is nothing compared to the Kaleidoscope and OMG collection. So I think I'll pass that Tronica collection!

Hebben jullie ook nog een aantal lakjes van de Kaleidoscope collectie? En wat vinden jullie van He's Going in Circles?/ Do you own some polishes from the Kaleidoscope collection? And what do you think about He's Going In Circles?

vrijdag 25 maart 2011

Catrice - Absolutely Chinchilly!

Het lakje Absolutely Chinchilly was één van de goodies uit de goodiedoos die ik gewonnen had bij IndeWatten! Absolutely Chinchilly komt niet uit de allerlaatste nieuw gemaakte lakjes, maar is nog redelijk nieuw! Ontzettend leuk dat dit lakje in de goodiedoos zat want dit was juist net het lakje welke de kruidvat in mijn buurt niet verkoopt!

The polish Absolutely Chinchilly was part of the goodybox I've won from IndeWatten! Absolutely Chinchilly isn't the newest polish, but it's not very old too, you can still buy it! I was very suprised with this polish! It was one of the polishes which aren't for sale at my local kruidvat.


Absolutely Chinchilly heeft een mooi kleurtje. Hij is net niet grijs, en net niet bruin. Ik denk dat Taupe het dichtst in de buurt komt. Dit lakje heeft een mooie crème finish, past er perfect bij! Helaas is dit niet echt een kleurtje voor de mooie lente of de zomer. Ik vind hem meer geschikt voor bijvoorbeeld de herfst. Ik denk dat ik hem voorlopig maar even tot de herfst in de kast laat staan!

Absolutely Chinchilly got a nice colour. It's not grey, and it's not brown either. I think taupe is the best way to describe this colour. This polish got a nice cream finish. Unfortunately this isn't the right colour for spring or the upcoming summer. It's more a fall/winter colour, so I think I'll let this polish stay in my closet until fall.

Zoals je kunt zien heeft Absolutely Chinchilly van zichzelf al een mooie glossy finish. Dit lakje dekte perfect na 2 dunne laagjes. Ook vind ik de applicatie van de nieuwe Catrice lakjes optimaal. Perfect kwastje, ik kan hier echt heel nauwkeurig mn nagels mee lakken, met deze lakjes zit ik vrijwel nooit op mijn nagelriemen, ook hoefde ik voor deze swatches geen clean up te doen, dat laat toch wel een beetje zien dat je behoorlijk nauwkeurig kan werken met het kwastje!


Absolutely Chinchilly got a nice glossy finish, but always use a topcoat! This polish was perfectly opaque in just 2 thin coats. I really like the application of the new Catrice polishes. Perfect brush, I can paint my nails very neatly with this brush, I didn't clean up my nails on above pictures so you can see how good the application is!


Catrice lakjes zijn verkrijgbaar bij het Kruidvat en Trekpleister voor €2,50 per stuk, let er wel op dat niet iedere kruidvat het complete assortiment verkoopt!/ You can buy Catrice polishes at the kruidvat or Trekpleister, they cost €2,50 each. Pay attention: not every store is selling the complete assortment!

donderdag 24 maart 2011

Stamping Ideas #5

Vandaag alweer deel 5 van Stamping Ideas! Klaar voor weer 6 nieuwe ideetjes??

Today it's already part 5 of Stamping Ideas! Are you ready for another 6 ideas??


De linkertip heeft een nude/oranje achtige achtergrond. Ik weet eerlijk gezegd niet meer welke lak dit is, maar er zal genoeg te vinden zijn van deze kleur! Het zwarte is een vogel, en de blauwe deeltjes, zijn een soort van wind tekens. Kortom een vliegende vogel met wind! Achteraf vond ik de achtergrond kleur niet zo heel goed gekozen maar ach!

De rechtertip heeft China Glaze - Flying Dragon als achtergrond. Zie je al die supermooie glittertjes in de lak? Flying Dragon is een neon, en droogt ook mat op. Ik zal deze binnenkort eens apart reviewen en swatchen! Over Flying Dragon heb ik een simpel bloemontwerp aangebracht. Simpel maar leuk!

On the left tip: I started with a nude/orange like base. I'm not sure which polish I used, but everything is good to use. The black stamp is a bird, and the blue stamps are some sort of wind symbols. So it's a flying bird in the air with some wind. Now I think it would be better to use a very light blue base for the background.

The right tip got China Glaze - Flying Dragon as the background. Do you see those awesome blue glitters in this polish?? Flying Dragon is a neon polish which dries matt. I will review/swatch this polish in another post soon! So I stamped a simple flower design over the Flying Dragon with a white polish. It's simple but nice!

Hier is de linkertip een beetje moeilijk te zien. De achtergrond is Lincoln Park after Dark (mat) van OPI. Daaroverheen heb ik met een groene lak een stempel gezet. Helaas is het effect niet zo mooi als wat ik voor ogen had. Wanneer je deze lak hebt adviseer ik om een beetje te spelen met stempels. Omdat de basiskleur mat is, is een shiny stempel natuurlijk een leuk effect! Een witte stempel zal sowieso wel goed staan!

De rechtertip is een simpel design voor iedereen die net kennis maakt met konad/stamping nailart. Of voor de dames met korte nagels die iets simpels willen. Een rode achtergrond met een witte stempel, ik heb hier een cartoonachtig doodshoofdje gestempeld.

The background from the left tip is OPI - Lincoln park after dark (matt). I stamped with a green polish, unfortunately it didn't turned out very well. When you own this polish I advise to play with some stamps. Because of the matt background, a shiny stamp would be very nice! I know that a white stamp would be very nice over this polish!

The righttip is a very easy design for the starters who are just starting with konad/stamping nailart. Or just for the ladies who want something simple or ladies with very short nails. It's a red background with a white stamp. You can stamp everything, but I choosed for a cartoon like skull.

De linkertip hier is echt één van mijn favorieten, ik vind hem echt schattig! De achtergrond is een mintgroenige kleur. Daaroverheen heb ik met geel wat sterretjes/vallende ster gestempeld. Dit is niet supergoed te zien, maar daarom wel mooi subtiel. Daarnaast een supercute kikkertje met een blaadje in zijn hand!

De rechtertip hier is gebaseerd op fruit. Zoals je kunt zien is hier een groene achtergrond, daaroverheen met rood een kersje gestempeld, en daarboven met blauw wat druifjes. Ik heb hier de stempels één kleur gehouden omdat niet iedereen stempelen met 2 kleuren fijn vind. Maar je zou bijvoorbeeld ook een andere achtergrondkleur kunnen kiezen en dan de kersjes met rood en een groen stengeltje stempelen.

The left tip here is seriously one of my favourite, I think it's supercute! The background is a minty green polish. I stamped some stars with a yellow polish, this isn't very noticable, but it's nice subtile. Next to the stars there is a supercute frog with a leave in his hand!

The right tip is based on a fruity design. I started with a green background. Over the green I stamped some cherry's with red and some grapes with blue. I kept it simple because not everyone likes to stamp with 2 colours. When you do like it, you can choose another background colour and stamp for example the cherry's with green and red.
 

Wat vinden jullie van deze ideetjes? Handig of niet?/ What do you think about these ideas? Are they handy or not?

woensdag 23 maart 2011

W.I.C. By Herôme - Mykonos

Vandaag de swatches van W.I.C (wat staat voor World Inspired Colours) by Herôme - Mykonos. Ieder lakje uit de W.I.C. lijn heeft de naam van een wereldse stad. Vandaag heb ik dus de swatches van Mykonos. Mykonos ligt in de Egeïsche zee en behoort tot de eilandengroep de Cycladen. Het is dus één van de eilandjes bij Griekenland. 

Today the swatches from W.I.C. (that stands for World Inspired Colours) by Herôme - Mykonos. Every polish from the W.I.C. collection stand for one city somewhere in the world. So today it's Mykonos turn. Mykonos lies in the Egeïsche sea and it's part of the Cyclade islands. So it's one of the islands near Greace.


Mykonos is een beetje een mysterieus kleurtje. Hij is licht, wat aan de sheer kant, en heeft onwijs mooie groen/blauwe shimmer. Het lakje ziet er in het flesje lichtgroenig uit, maar wanneer je het eenmaal op je nagels smeert is er geen kleur meer die dit perfect omschrijft, het wordt dus maar een dagje foto's kijken!

Mykonos is a bit of a mysterious colour. It's light, a bit sheer, and it got very nice green/blue shimmers. The polish in the bottle looks like a very light green, but when you put it on your nails it's totally different! Seriously, I don't know how I can describe this polish, this is gonna be a post where the pictures do the thing!

Zoals je kunt zien is dit idd een lakje welke een beetje sheer is, ik denk dat je hem wellicht geheel dekkend kunt krijgen met een extra laagje lak. Op bovenstaande foto's heb ik 3 laagjes lak aangebracht, toch vind ik dit sheer wel een leuk effect geven, het is geen storend sheer lakje! Wanneer je de foto vergroot kun je de shimmer enorm goed zien, echt prachtig! Dit is het allereerste lakje welke ik uitgeprobeerd heb van W.I.C. By Herôme, en ik ben zeer verrast! Fijn kwastje en een makkelijke applicatie. De droogtijd is met 3 laagjes lak natuurlijk iets minder, maar niet erg storend.

As you can see, this polish is a bit sheer, maybe you can get it opaque with one extra layer. I used 3 layers of polish on above pictures, but I really like the sheer effect by this polish! It's not an irritating sheer polish, it's kind of nice! When you enlarge the picture you can see the gorgeous shimmer even better! So this was my first trial with polishes from W.I.C. by Herôme and i'm very happy with it! Nice brush, good application. Dryingtime was less, but that's because of the 3 layers.

Hierboven nog een mooie uitvergroting van dit lakje! Lakjes van W.I.C. by Herôme kosten €7,50 per stuk. Je kunt de lakjes kopen via de webshop, of je kunt in dit overzicht kijken naar alle verkooppunten van W.I.C. By Herôme.

Above a nice enlarged picture of this polish! Polishes from W.I.C. by Herôme costs €7,50 each. You can buy them via their webshop, or just look at this list for all the stores who're selling W.I.C. by Herôme.

Review: Kruidvat Basecoat

Dat een basecoat een must is om te gebruiken onder je prachtige creaties of onder je vers gelakte manicure weten we natuurlijk allemaal! Ik heb jaren gebruik gemaakt van de Basecoat van Catrice (in combinatie met de quick dry topcoat), nadat deze basecoat bij mij in de buurt niet meer te verkrijgen was ben ik wat andere basecoats gaan uitproberen!

A basecoat is a must to use when you freshly polishes your nails, everyone knows that! I used the Catrice basecoat for years (in combination with the quick dry topcoat). But after missing this basecoat in our local stores I had to pick out another basecoat.

De basecoat die ik op dit moment gebruik is de basecoat van Kruidvat eigen merk. Zoals je op bovenstaande foto kunt zien, het potje is al voor iets meer dan de helft leeg, ik heb hem dus echt uitgebreid getest! Het flesje bevat 9 ml basecoat en heeft een mooi vierkant ontwerp. Als je de basecoat koopt zit hij nog in een mooie vierkante kartonnen verpakking.

This is the basecoat i'm currently using. It's a basecoat from kruidvat. As you can see, it's halve empty, so i tested it very well! Het bottle contains 9 ml and has a square shape. When you buy this basecoat it's also in a square packaging.


Zo ziet de basecoat eruit op mijn nagels. Je kunt meteen zien dat ik geen nepnagels heb, maar echt alles doe op mijn eigen natuurlijke nagels (haha ja ik krijg nog steeds veel vragen of ik kunstnagels heb). Mijn nagels zijn aan de gelige kant, maar eerlijk gezegd waren ze ook met de catrice basecoat geel. De basecoat is in het flesje roze, maar zoals je kunt zien is hij op mijn nagels gewoon doorzichtig.

This is how the basecoat is looking on my nails. You can see my natural nails here, (I still got lots of questions about wearing fake nails, but no ladies, everything is on my natural nails!). So my nails are a bit yellow, but I have to admit, when I used the catrice basecoat they were the same colour. The basecoat is pink in the bottle, but as you can see it's clear on my nails.

De pluspunten/good points:

- Droogt snel / Dries quick!
- Nagellak blijft goed zitten met gebruik van deze basecoat / Duration of nailpolish is very well while using this basecoat.
- Zuinig in gebruik, na meer dan een halfjaar is pas de helft op / Spare using, after using this basecoat for more then halve a year it's only half empty!
- Goedkoop, ik betaalde €1,- voor dit lakje (normale prijs is ongeveer €1,25 geloof ik)/ Cheap, I payed only €1,- (normal prize is €1,25)
- Makkelijk te verkrijgen, iedere kruidvat verkoopt ze / easy to get (for the dutchies ;))
- De lak wordt niet stroperig na een lange tijd gebruiken!/ This polish didn't get thick/sticky after lots of using.
- Fijn breed kwastje, applicatie is heel makkelijk! / Nice wide brush, application is heaven!

De minpunten/ Bad points:

- Mijn nagels worden ondanks gebruik van deze basecoat toch gelig (maar ook bij andere basecoats, misschien ligt dit wel gewoon aan mij :p)/ My nails are a bit yellow, so it doesn't safe you against stained nails (but I had this with my other basecoat too, so maybe it's just me?)
- Het kwastje is iets aan de korte kant, daarom is het moeilijk om het laatste beetje uit het potje te krijgen / The brush is a little bit to short, it's hart to get the rest out of the bottle now.

Mijn eindconclusie is dan ook dat dit een prima basecoat is, zeker voor de prijs die je ervoor betaald. Zoals je kunt zien zijn er maar 2 iets mindere puntjes aan deze basecoat, en daarnaast een waslijst aan goede punten! Ik heb inmiddels alweer een nieuw potje van de Catrice basecoat, wanneer ik deze weer gebruik zal ik hier ook een aparte review van maken. Dit is in ieder geval een basecoat welke ik zeker weten nog eens opnieuw zou kopen!

My conclusion is that it's a very good basecoat, especially for the prize you pay for it. As you can see this basecoat only got 2 bad points, and lots of good points! By this time I've got a new bottle of my Catrice Basecoat, I will make another review over that basecoat later when i'm using it again. At this point, I will definitely buy this product again!

maandag 21 maart 2011

Paris Memories - Nr 207

21 Maart, de eerste dag van de Lente! Eindelijk weer eens wat beter weer, geen sneeuw, geen kou, in 1 woord: happy! Hoe kun je nou beter de eerste dag van de lente beginnen met een heerlijk mooi zacht nagellakje?

March 21, first day of spring! Finally, no more snow, no more cold weather, 1 word: Happy! How can we celebrate first day of spring better then polishing your nails with a beautiful soft spring shade?


Paris Memories - nr 207 is echt een perfecte softe roze tint. Hij neigt zelfs een beetje richting nude. Ik heb echt een zwak voor dit soort mooie pastel lichte roze tinten, het geeft mij echt een heerlijk lente gevoel!

Paris Memories - Nr 207 is thé perfect soft pink shade. It's almost nudish. Maybe you know, but I have a big weakness for these kind of pastel light pink shades, it gives me the ultimate spring feelings!

Nr 207 is dus een mooie lichte roze pastel tint. Helaas zie je op bovenstaande foto's rare strepen, dit is in real life dus echt niet het geval, net zoals de VNL... Ik moet zeggen dat ik best blij verrast was met dit lakje, ik vond hem in de winkel supermooi, maar kocht hem wel met de gedachte dat hij wel eens heel goed heel sheer kon zijn. Gelukkig was dit helemaal niet het geval! Het koste me één extra laagje dan andere lakjes, op bovenstaande foto's heb ik 3 laagjes lak gebruikt.

So nr 207 is a pastel light pink polish. Unfortunately my camera made some freaky stripes on my nails, and it made the polish sheer... This wasn't in real life! I have to say I was pretty surprised with this polish, I really loved the shade in the bottle, but I bought it with the idea that the polish was probably sheer. So happy as I was when I saw this polish completely opaque after just 3 coats! That's only one coat more then I usually use (hehe that sounds funny ^^).


Bovenstaande foto is echt degene geworden die het dichts bij real life komt. Geen strepen en geen VNL. Dit lakje heeft een crème finish met een mooie gloss, deze gloss wordt nog mooier met een laagje topcoat. Dit is trouwens hetzelfde lakje die ik gister heb gebruikt op de french manicure bij de Hello Kitty Nailart! Ik kocht dit lakje bij de Dirx drogist voor nog nieteens €2,-. In sommige Douglas fillialen kun je dit merk ook vinden!


Above picture is the most realistic! No freaky stripes and no VNL! This polish got a cream finish with a nice gloss, ofcourse the gloss is nicer with a layer of topcoat. This is the same Paris memories polish as I used in my Hello Kitty mani yesterday! I bought this polish at Dirx Drogist, you can buy this one at some Douglas stores too. The price was less then €2,-!


Wat voor kleur lak brengt bij jullie het ultieme lente gevoel naar boven? / Which colour of polish gives you the ultimate spring feelings?

zondag 20 maart 2011

Notd: Hello Kitty Nailart

Vandaag heb ik weer een nieuwe nailart voor jullie! Bijna iedereen kent de welbekende Hello Kitty stampingplate inmiddels wel. Ik heb deze stempelplate ook gebruikt voor onderstaande nailart!

Today another new nailart! This time it's an Hello Kitty Nailart. Everyone knows the cute stampingplate with the Hello Kitty image. Yes I used that one! Look further to see my nailart!


Ik ben begonnen met een simpele french manicure met een roze lakje van Paris Memories. Voor de french manicure leek het me leuk om eens met andere sjablonen aan de gang te gaan, maar dit flopte dus, de lijn was totaal niet recht. Daarom heb ik besloten om aan het eind van de French Manicure nog een apart donkerroze lijntje te maken. Verder heb ik over de french manicure Golden Rose - Nr 03 gebruikt, welke een flakie is, zoals je kunt zien is hij over een licht lakje heel anders als over zwart zoals ik gister liet zien.

I started with a simple French Manicure with a light pink polish from Paris Memories. I used some guidelines for the french manicure, but this was a total fail, it ruined my french manicure. So I decided to draw a line with a dark pink polish. Further I used Golden Rose - nr 03 (which is a flakie) over the pink french. As you can see, this flakie is a lot different on a light base compared with the black base yesterday.

En dit is de uiteindelijke nailart geworden! Ik was eerst van plan om hello kitty wat uitgebreider te maken, haar een wit kopje en roze strikje te geven. Achteraf besloot ik dit niet te doen, omdat het dan wellicht iets te druk en te roze zou worden. Ik heb dus gewoon met Konad - Gold Black het hello kitty hoofdje erop gestempeld. Zo vielen ook de flakies een beetje op zonder dat dit alles wegviel.

And this is the nailart! My original plan was making hello kitty white with a pink ribbon, but I decided not to, because the effect of the flakies will disappear. So I just stamped the Hello kitty with Konad - Black Pearl. I actually liked how this nailart turned out!

Wat vinden jullie van deze Hello Kitty Nailart/What do you think about this Hello Kitty nailart?

zaterdag 19 maart 2011

Golden Rose Flakies!

In mijn february haul liet ik jullie deze gave flakies van Golden Rose zien. Heel veel waren benieuwd naar de swatches, dus bij deze vandaag de swatches, en een klein microfilmpje zodat je het effect van de flakies nog beter kunt zien! Inmiddels heb ik er nog een andere flakie bij, deze zal ik later in een aparte post swatchen.

In my february haul I showed you these awesome flakies from Golden Rose. I recieved a lot of questions for swatches, so today i'm going to show you the swatches and a micro video so you can see the effect very well! I also have another flakie (a red one) but i'll swatch that one in another post later.


Dit is uiteindelijk de enige foto geworden waarbij de flakies enigszins goed te zien waren! Dit is ook de reden van het microfilmpje! Ik heb de flakies geswatcht over een zwart lakje, over een zwarte basis zijn de flakies het best te zien. Op bovenstaande foto van boven naar beneden: nr 03, nr 05, nr 06 en nr 14. Nr 03 en nr 05 geven beide oranje flakies en nr 06 heeft groene flakies. Nr 14 is het donkerste lakje en geeft blauwe en groene flakies. Ik heb op iedere nagel één laagje flakies aangebracht.

This is the only picture which was worth to show! This is the reason why I made a micro video. I swatched the flakies over a black polish because this will show the flakies on their best. On above picture you can see beginning with my index: nr 03, nr 05, nr 05 and nr 14. Nr 03 and nr 05 are both orange flakies, nr 06 got green flakies, and nr 14 which is the darkest has green and blue flakies. There is one coat of flakies on each nail.

Zoals je op mijn eerste foto al kunt zien zijn nr 03 en nr 05 eigenlijk precies hetzelfde. In het flesje zien ze er anders uit maar layered over zwart geven ze beide hetzelfde effect. Op bovenstaande foto zie je links nr 03 en rechts nr 05. Als je dus één van deze lakjes wil adviseer ik je om een van beide te kiezen, ze zijn hetzelfde dus het heeft weinig nut om ze beide aan te schaffen.

As you can see on my first picture: nr 03 and nr 05 are both the same. The bottles are looking different, but when you layer this polish over a black polish they'll be exactly the same as you can see on my picture. So do you want to buy this kind of flakie? Choose or number 03 or number 05, it's useless to buy both of them.

En als laatste nog het filmpje. Op het filmpje kun je mooi het effect zien, en kun je ook mooi zien dat de flakies in een ander licht andere kleuren afgeven. Veel plezier met kijken!


And last but not least the micro video. You can see the flakies very well, you can see the effect with different lightings too. Here you can see that the flakies from 03 and 05 both have yellow flakies too. Have fun watching!

Thanks for stopping by and enjoy your weekend!

vrijdag 18 maart 2011

Comparison: Max & Hema

Vandaag een comparison tussen bovenstaande lakjes. Het is Max - Peach en een mini Neon lakje van de Hema. Vorige maand liet ik jullie de swatches van Max - Peach al zien (Even het geheugen opfrissen, zie hier!). In de potjes leken deze 2 kleurtjes echt identiek, dus tijd om ze even te vergelijken!


Today a comparison with above polishes. They're Max - Peach and a mini neon polish from Hema. Last month I showed you the swatches from Max - Peach (You can see the post here). When you look at the bottles you will see an identical polish, let's compare!


Hier zie je max - Peach op mijn wijs en ringvinger en Hema neon op mijn middelvinger en pink. Zoals je kunt zien zit er eigenlijk geen verschil in deze twee lakjes. Op bovenstaande foto lijkt mijn ringvinger iets donkerder maar dit is meer een kwestie van lichtinval. De kleur is dus gewoon echt indentiek, en zoals je op de foto met de flesjes kunt zien is ook het flesje van Max een stukje groter dan het flesje van de Hema is. Pluspunt voor Max!


Here you can see Max - Peach on my index and ringfinger, and hema neon on my middlefinger and pinkie. As you can see, there isn't any difference between these 2 polishes. My ringfinger looks a bit darker on above picture but this is because of the shading. So these 2 colours are identical, official dupes! On the bottle pic you can see that the bottle from Max is a bit larger then the bottle from hema. Asset for Max!


De applicatie van deze 2 lakjes is wel verschillend. Om te beginnen bij het kwastje, het kwastje van Max is mooi breed dus lakt erg fijn, het kwastje van het hema lakje is wat aan de smalle kant. Bij dit punt kies ik dus ook voor het Max lakje. Het aanbrengen heeft niet veel verschil, beide lakjes hebben 3 laagjes nodig om goed dekkend te zijn, na 2 laagjes hebben ze beide nog een VNL, op dit punt heb ik geen voorkeur qua lakje. Als laatste de prijs, het Max lakje kost €0,50 en is verkrijgbaar bij de action, ook is het flesje redelijk groot. Hema lakjes kosten €2,00 per stuk voor een minilakje, dit flesje is ook een stuk kleiner dan het flesje van Max. Ook op dit punt kies ik voor het lakje van Max.


Application from these 2 polishes are different. Let's start with the brush. The brush from Max is pretty wide, application is very easy. The brush from Hema is way smaller, application is a bit harder. Because of the brush I see choose Max. The second point is coverage. Both polishes needed 3 coats to be full opaque, so there isn't any difference between this, you can see a VNL with 2 coats by both polishes. With this point I don't have a favourite because it's exactly the same. The last point is price. A polish from Max costs €0,50 available by Action, the bottle is a bit bigger then the Hema polish. The hema polish costs €2,00 for a minibottle. The price point goes to Max as well!


Mijn eindconclusie is dan ook dat je net zo goed het lakje van Max kunt kopen, je bespaard hier wat geld mee, het kwastje is fijner, het potje is groter en de kleur is exact hetzelfde als het hema lakje.


My conclusion is buy the Max polish, you save some money, the brush is nicer, the bottle is bigger and the colour is exactly the same as the hema polish.

donderdag 17 maart 2011

Review: Half Pearls Decoration Wheel

Vandaag een review van bovenstaand product, het laatste product van Born Pretty Store. Dit is de Half Pearls Decoration wheel. Een wheel met halve pareltjes in verschillende kleuren dus. Zoals je kunt zien zitten er witte, zalmkleurige, felroze, paarse en blauwe parels in.

Today a review of above product. It's the last product from the stuff I recieved from Born Pretty Store. This is the Half Pearl Decoration Wheel. So it's wheel with halve pearls in different colours. As you can see: there are white, salmon, pink, purple and blue pearls.


Zoals je kunt zien zijn de pareltjes heel makkelijk op te pakken, ik heb hierboven een dottingtool gebruikt. Je kunt ook een tandenstoker, rhinestone picker en andere scherpe voorwerpen gebruiken. Even het uiteinde een beetje vochtig maken en de pearl blijft er zo aan zitten! Op deze manier kun je dus heel simpel een pareltje oppakken en hem op je nagel leggen. Een dikke pluspunt!


As you can see, they're very easy to pick up. I used a dottingtool on above picture but you can use a toothpick or rhinestone picker or other sharp stuff too. Just moist the end of the dottingtool and the pearl will stick to it. Now you can easily put the pearl on your nails. A very big asset!

Dit zijn de creaties die ik ermee gemaakt heb. De pearls ogen heel erg chique! Op bovenstaande foto heb ik de creaties gemaakt op wat losse tips. Ik heb ook een aparte nailart met deze pearls gemaakt maar deze zal wat later in een aparte post verschijnen. Je kunt de pearls trouwens in natte nagellak duwen, in topcoat duwen of net zoals ik altijd doe met een klein beetje nagellijm. Ik vind persoonlijk dat de pareltjes een stuk beter blijven zitten met wat lijm, met enkel topcoat liggen de pareltjes er bij mij zo af! Met lijm blijft het perfect zitten voor langer dan een week.

These are some creations I made with the pearls. They are very chique! I used some nailtips for above creations, I made a creation on my own nails too with these pearls, but I'll show them a little bit later in another post. Alright you can put these pearls on wet nailpolish, on wet topcoat or just like I do put it on with some nailglue. I prefer last choice because they'll stick much better, with some nailglue these pearls will last more then a week on your own nails.


Hierboven nog een aantal vergrote afbeeldingen van de gemaakte creaties. Dit wheel met halve pareltjes is te verkrijgen bij Born Pretty Store en kost $3,15 wat omgerekend ongeveer €2,25 is. Je betaald ook nog eens geen verzendkosten bij Born Pretty Store! Interesse in ditzelfde wheel? Neem *hier* eens een kijkje!

Above some enlarged pictures of my creations. You can purchase this half pearls wheel by Born Pretty Store. This wheel costs $3,15 this is €2,25. You don't pay shipping costs by Born Pretty Store! Do you want this wheel too? Take a look out *here*!

*This product was sent to me for consideration, ofcourse this will not effect my opinion. For more information please read my disclaimer on top of the page*

woensdag 16 maart 2011

Layering Experiment: Break Through & Frostbite

Vorige week liet ik jullie de lakjes Essence Break Through (van de Colour & Go collectie) en Essence - Frostbite (van de Go Snow collectie). Vandaag heb ik deze 2 lakjes gebruikt voor de nieuwe Layering Experiment, kijk mee naar het resultaat!

Last week I showed you the polishes Essence - Break Through (From the Colour & Go collection) and Essence - Frostbite (from the Go Snow collection). I made a new layering experiment with these 2 polishes. Look further to see the final results!


Op bovenstaande foto heb ik 2 laagjes Essence - Break Through aangebracht met één laagje Frostbite. Frostbite is zonder basislak een enorm sheer lakje, maar met basislak kun je op bovenstaande foto erg goed zien dat hij behoorlijk wat mooie shimmer afgeeft. Één laagje is in dit geval al genoeg voor een mooi resultaat.

On above picture you can see 2 layers of Essence - Break Through and one layer of Frostbite. As you know frostbite is a sheer polish, but with a nice basecolour it is nice opaque with just one coat. I enjoyed all the shimmers! One coat is more then enough for this nice result!

Ik vind dit echt een geslaagd layering experiment! Nu ik deze combinatie zo zie denk ik dat ik de overige 2 lakjes van de Go Snow collectie ook maar eens uit de kast moet halen! Omdat alle lakjes erg sheer zijn heb ik ze eigenlijk op een swatch na nooit gebruikt, maar misschien is het wel een leuk idee om ook met die lakjes een layering experiment te doen, is hier interesse voor? Laat het me maar even weten, ik doe het graag!

I really like this layering experiment, this combination is just wow! Now i'm looking at these pictures I think i'm going to search for the other 2 polishes from the Go Snow collection. The other 2 polishes are both sheer too, but maybe they're perfect for a new layering experiment! Is there someone who is curious for combination with the other 2 Go snow polishes, please let me know, I'll do it with lots of fun!

Thanks for stopping by, enjoy your evening!

dinsdag 15 maart 2011

E.L.F. - Mod Mauve

Ik heb jullie al eerder wat lakjes van E.L.F. (Eyes, Lips, Face) laten zien. Vandaag is het de beurt aan Mod Mauve!

I showed you some E.L.F. (Eyes, Lips, Face) polishes before, today I'm going to show you Mod Mauve!

Dit is de productfoto op de website, ik vraag me af of ze inmiddels nieuwe afbeeldingen hebben toegevoegd. Ik kan me namelijk écht niet herinneren dat dit lakje bruin afgebeeld stond toen ik heb kocht, eerder als paars. Ik heb namelijk een hekel aan bruin, dus ik zou m zo nooit gekocht hebben met deze afbeelding!

This is the productimage from their website, I'm wondering if they replaced the images. I can't remember buying a brown nailpolish.. I hate brown, why would I buy it when I see this picture? I can remember a more purple/mauve like image, but alright, this one is better compared with the polish!

Zoals je kunt zien komt de kleur nu wel redelijk overeen met de productafbeelding. Dat houdt dus in dat of ik gek ben en echt een 'bruinachtige' nagellak aanheb geschaft, of E.L.F. bezig is met de productfoto's verbeteren, ik mag hopen op het laatste ;-). Ik vind de kleur persoonlijk echt bruin, niks geen mauvelike, in mijn ogen gewoon bruin met een crème finish. Ik haat bruin... Dus eigenlijk vind ik dit lakje ook maar niks!

As you can see, the colour is more like the productimage now, it's almost the same! Which means or I'm crazy for bying a brown polish, or E.L.F. is busy with making their images more realistic. Let's hope it's option 2 ;-)! When you ask me, this polish is just brown, nothing mauve like just brown with a cream finish. Let me come to the point of saying that I hate brown polishes.. So do I like this colour? Hmm No!

Als je dit lakje in een ander licht bekijkt, zoals op bovenstaande foto zie je een klein beetje een paarsachtige gloed eroverheen. Maar voor mij niet goed genoeg om dit kleurtje mooi te vinden. Applicatie was wel erg goed, de kwastjes van E.L.F. vind ik persoonlijk erg fijn lakken, ze zijn best breed dus brengen mooi aan. Dit lakje is wel mooi dekkend na 2 dunne laagjes.

When you look at this polish in another light, like above picture you can see some sort of purple/mauve glow, but it's not enough for me to like this polish actually. Application was pretty good, I like the brushes from E.L.F. polishes, they're pretty wide. This polish is completely opaque with 2 thin coats of polish.


Wat vinden jullie van dit soort tinten nagellak, like it or hate it?/ What do you think about this polish, do you like it or hate it?

maandag 14 maart 2011

Review: Purple Kelier Crack Polish

Vandaag een review van bovenstaand product. Het is de Kelier Crack polish in de paarse kleur van Born Pretty Store. Let op deze post bevat veel foto's én een youtube filmpje!

Today the review of above product. It's the purple Kelier Crack polish from Born Pretty Store. Watch out, this post is full with pictures and a youtube video!


Ik heb als basiskleur een goed dekkende witte nagellak genomen. Ik heb hier La femme Beauty - White gebruikt. Een echt wit typex lakje die goed dekt na 2 laagjes. Je kunt natuurlijk ook andere kleuren als basis gebruiken!

I used a opaque white polish for the base. I used La Femme Beauty - White. This is an 2 coat white polish. A typical typex polish! Ofcourse you can use other colours too!

Ik vind dit lakje echt ontzettend leuk cracken! Hij crackt heel anders dan mijn eerste crackpolish die ik uitprobeerde, ook crackt hij heel anders dan de Crackle Glaze lakjes. Je kunt heel leuk met dit lakje spelen, je kunt de lak op verschillende manieren aanbrengen, hij zal dan steeds anders cracken. Natuurljk kun je ze ook allemaal verticaal aanbrengen, ook dan krijg je steeds een ander design.

I really like this polish! It's a completely different crackpolish then my first crackingpolish, it's also nothing like the Crackle Glazes are. You can have lots of fun with this polish, it cracks different when you apply the polish in a different direction. When you apply every nail in a vertical direction ofcourse it will crack different on each nail.

Kelier Crack lakjes cracken iets minder snel dan de Crackle Glazes doen, maar blijven daarintegen een stuk langer zitten. Ook is dit lakje behoorlijk moeilijk te verwijderen! Het blijft dus heel goed zitten. Je kunt de cracks een beetje beïnvloeden dmv het aanbrengen van het lakje, gebruik je een heel dun laagje (zoals op mijn ringvinger) dan zul je allemaal leuke kleine cracks zien. Gebruik je een dikker laagje (zoals op mijn pink) zullen de cracks iets groter zijn. Het is dus maar net wat je zelf leuk vind. Let er wel op dat je een niet té dik laagje aanbrengt, dit zal slecht drogen dus ook slecht cracken. Dit lakje is in ieder geval een dikke aanrader!

Kelier Crackpolishes are a bit slower with cracking then the Crackle Glazes are, but the durable of this polish is way better then the crackle glaze. I had a rough time removing this polish! You can play with the cracks through applying the polish. When you add a very thin coat (like my ringfinger) you will get cute small cracks. When you apply a thicker coat (on my pinkie) the cracks will be a bit bigger. Pay attention: don't apply a very thick coat, this will not dry and will not crack! My conclusion is I really love this polish, I would definitely buy it again!

En als laatste een microfilmpje hoe je kunt zien hoe het lakje crackt. Sorry voor de slechte kwaliteit, Youtube heeft de kwaliteit van dit filmpje echt heel slecht gemaakt!

And last but not least: A youtube video, you can see the polish crack here! I'm sorry for the bad quility, this is because of youtube..

Je kunt Kelier crack lakjes kopen bij Born Pretty Store *HIER* Ze kosten per stuk $4,02. Elk lakje bevat 15 ml.
You can buy this polish by Born Pretty Store *HERE*. They cost $4,02 each they contain 15 ml.

*This product was sent to me for consideration, ofcourse this will not effect my opinion, please read my Disclamer for more information*